Better Auth + Shootmail - Send custom emails on authentication events
 subhendu singh
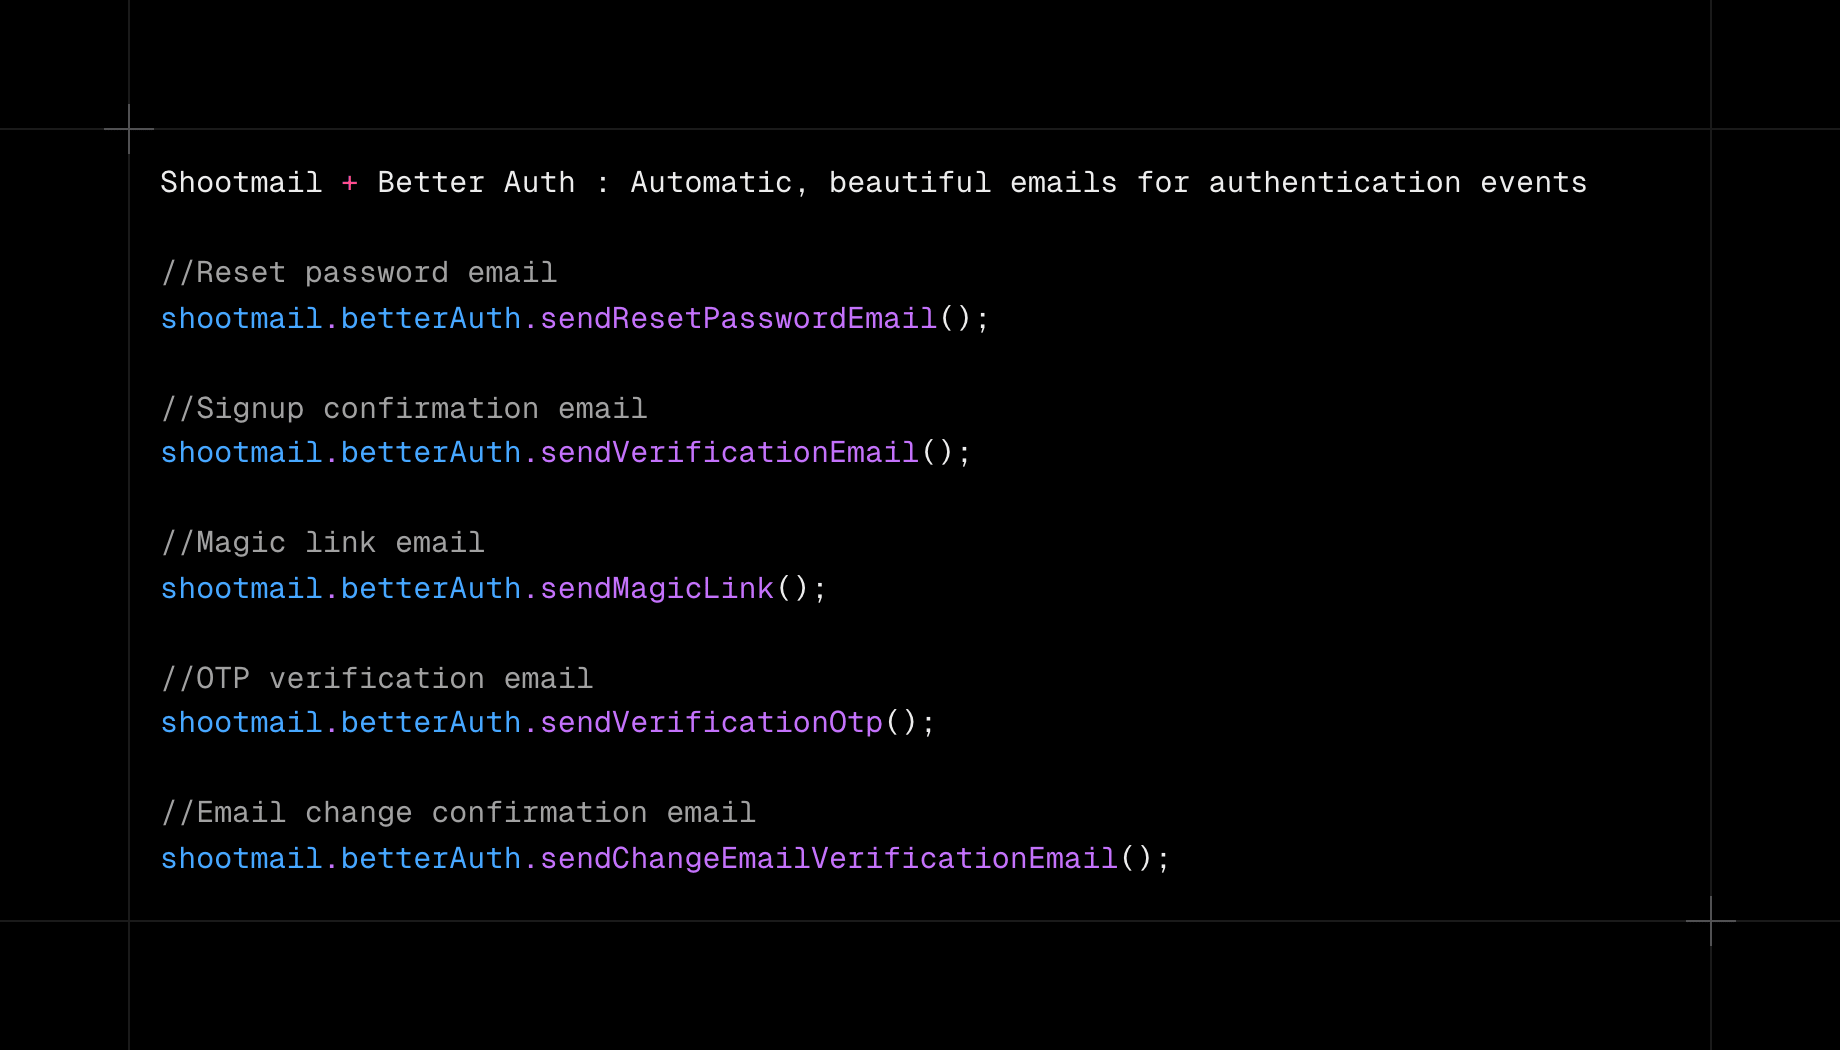
Pre-built templates for Better Auth
First things first, here are the pre-built email templates for better auth that you can use today.
What is Better Auth?
According to the Better Auth docs, it is a framework agnostic authentication and authorization framework for typescript. It has multiple options for authentication like:
- Email & password
- Social sign-on
- SSO, etc
It also has a plugin ecosystem that allows you to extend your authentication with features like 2FA, organizations, RBAC etc.
Why are emails needed with Better Auth?
Emails are needed with better auth to notify your users during various stages of authentication and authorization. For example:
- Send email to confirm signup email
- Send magic link email for sign in
- Send reset password email with a link to reset password
- Send one time passwords (OTP) on mail
- Invite a new member to organization via email
While Better Auth provides you a simple to use typescript SDK to quickly roll your own auth with all the features, it doesn’t yet have an inbuilt solution to send emails.
This is where Shootmail comes in. You can plug Shootmail’s SDK with Better Auth, that automatically sends emails to your users at different events. These emails are already designed to look beautiful and are highly compatible with major email clients, even in dark mode.
Let’s jump straight into how to configure Shootmail and Better Auth together.
Setup Shootmail
I will go through the step by step process here. You can always refer the docs.
Grab Shootmail API key
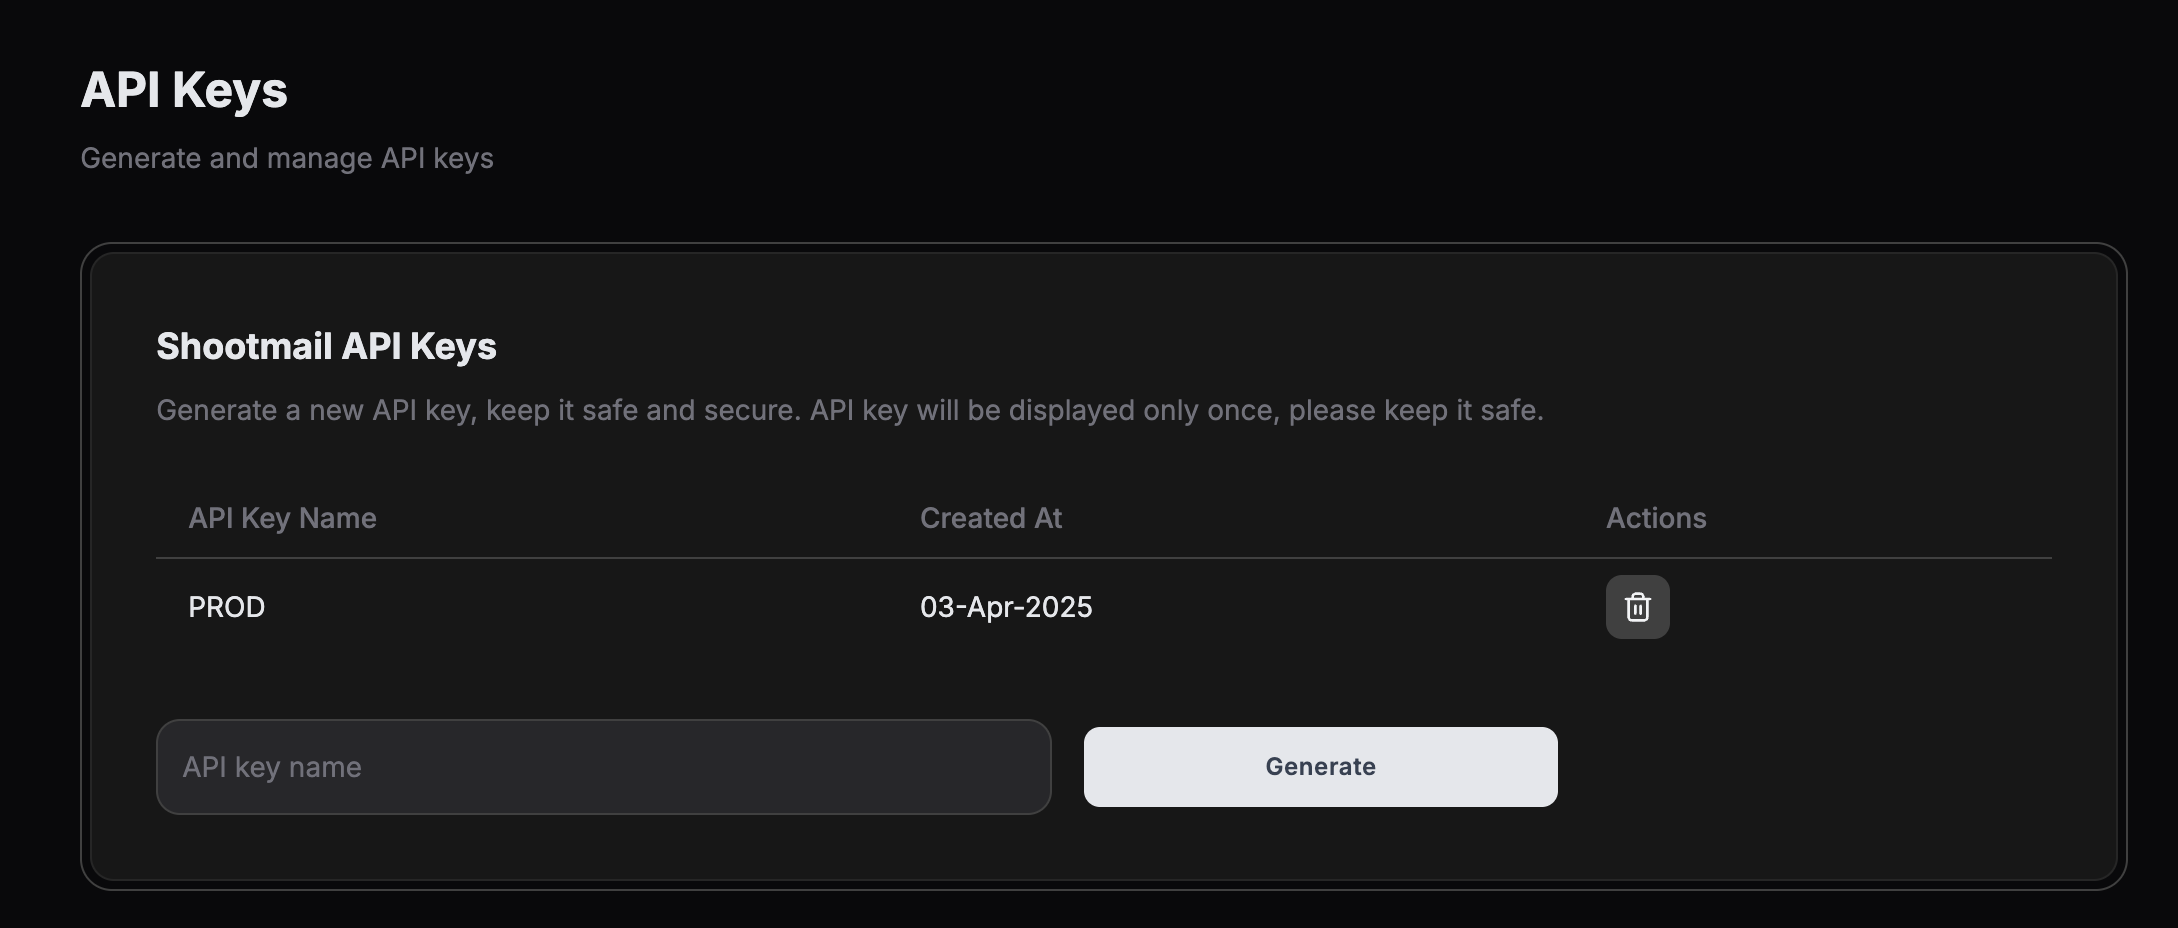
You can signup on Shootmail using this registration link. One you have signed up, go to API Keys and generate a new api key.
Install Shootmail SDK
Install the Shootmail SDK using npm or pnpm
npm i --save shootmail
// or pnpm i shootmailInitialize Shootmail client
In a separate file shootmail.ts, initialize and configure Shootmail SDK client.
import { Shootmail, type ShootMailConfig } from "shootmail";

export const shootmail = new Shootmail({
	 shootmailApiKey: "shootmail-api-key",
	 from: {
			"name": "your-email",
			"email": "your-email"
	 },
	 providers: [
		 {
         "provider": "resend", // or any supported provider
         "apiKey": "resend-api-key"
      },
	 ]
});
Here is a list of all the supported providers you can use. In the above code, do not forget to replace:
- From email
- Shootmail API Key
- Provider information
Setup Better Auth
Install better auth SDK and setup the database, here is the documentation to get started.
Use Shootmail to send emails at different authentication event
In all these email calls, you will use the shootmail client configured previously in shootmail.ts. Let us pre-configure all our email template IDs in an enum to make it easy for us to reference them
const enum ShootmailTemplates {
VerificationEmail = "wxltewafrklxhgg",
MagicLink = "sgarbaenwceoywo",
OTP = "wcxzbahqggyogtz",
TeamInvite = "ygrpeyqfdpzibcl",
AccountDeletion = "gcpdbxildytxogo",
EmailChange = "hrjwebwpocangal",
PasswordReset = "aykfbwltyitbxnp"
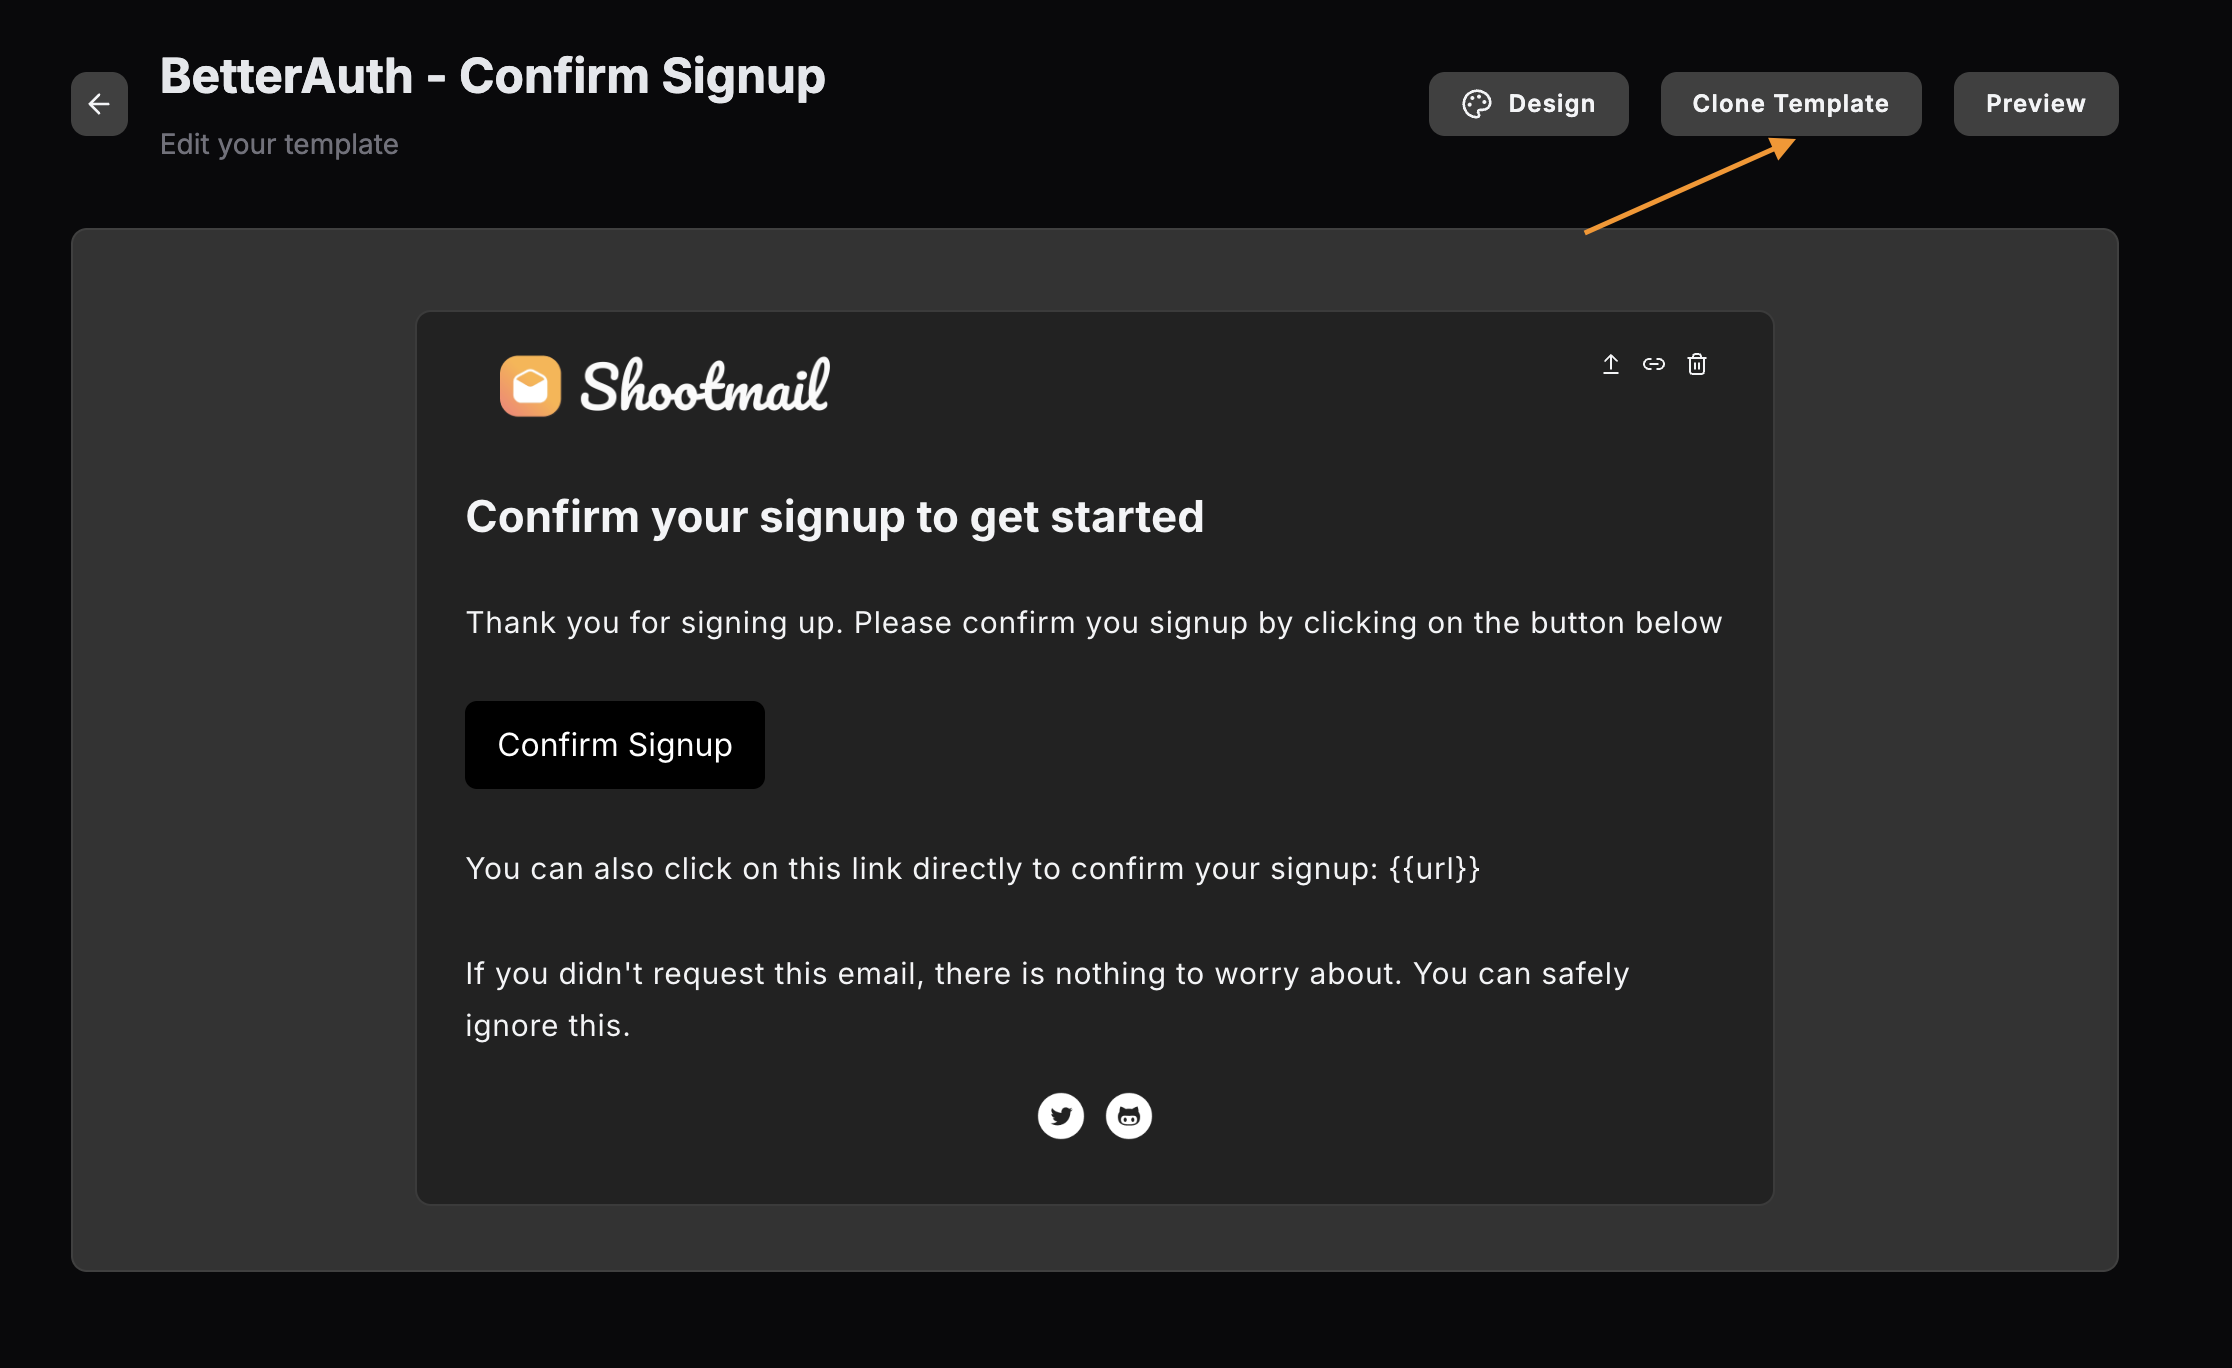
}Please note, these are default email templates IDs and are not recommended to user in production. Instead, you should create your own simply by cloning these default email templates in the Shootmail dashboard. Here is how to do this:
- Login to you Shootmail dashboard
- Go to purchased templates section
- Search for
better auth - Click on the template you want to use and clone it. This will generate a new ID for that template. Copy this ID to use later.
Signup confirmation email
Method
shootmail.betterAuth.sendVerificationEmail()Usage
const shootmailResponse = await shootmail.betterAuth.sendVerificationEmail({
      templateId: ShootmailTemplates.VerificationEmail,
      verificationUrl: data.url,
      toEmail: data.user.email,
 });
Implementation
export const auth = betterAuth({
    appName: "Better Auth Demo",
    database: drizzleAdapter(db, {
        provider: "sqlite",
    }),
    emailVerification: {
       sendOnSignUp: true,
        sendVerificationEmail: async (data, request) => {
            // Shootmail code
            const shootmailResponse = await shootmail.betterAuth.sendVerificationEmail({
                templateId: ShootmailTemplates.VerificationEmail,
                verificationUrl: data.url,
                toEmail: data.user.email,
            });

            console.log("shootmailResponse in email verification", shootmailResponse);
        },
}Send magic link email
Required better auth magic link plugin
Method
shootmail.betterAuth.sendMagicLink()Usage
const shootmailResponse = await shootmail.betterAuth.sendMagicLink({
  templateId: ShootmailTemplates.MagicLink,
  toEmail: data.email,
  verificationUrl: data.url,
});
Implementation
export const auth = betterAuth({
 ....
  plugins: [
    magicLink({
      sendMagicLink: async (data, request) => {
        const shootmailResponse = await shootmail.betterAuth.sendMagicLink({
          templateId: ShootmailTemplates.MagicLink,
          toEmail: data.email,
          verificationUrl: data.url,
        });

        console.log("shootmailResponse in magiclink", shootmailResponse);
      },
    }),
  ],
});Send OTP email - 2FA
Required better auth two factor plugin
Method
shootmail.betterAuth.sendVerificationOtp()Usage
const shootmailResponse = await shootmail.betterAuth.sendVerificationOtp({
  templateId: ShootmailTemplates.OTP,
  toEmail: data.user.email,
  otp: data.otp,
  type: "sign-in",
  validityInMinutes: 5,
});
Implementation
export const auth = betterAuth({
 ....
  plugins: [
    twoFactor({
      otpOptions: {
        sendOTP: async (data, request) => {
          const shootmailResponse =
            await shootmail.betterAuth.sendVerificationOtp({
              templateId: ShootmailTemplates.OTP,
              toEmail: data.user.email,
              otp: data.otp,
              type: "sign-in",
              validityInMinutes: 5,
            });

          console.log("shootmailResponse in otp", shootmailResponse);
        },
      },
    }),
  ],
});Send reset password email
Method
shootmail.betterAuth.sendResetPasswordEmail()Usage
const shootmailResponse = await shootmail.betterAuth.sendResetPasswordEmail({
  templateId: ShootmailTemplates.PasswordReset,
  toEmail: data.user.email,
  resetPasswordUrl: data.url,
  subject: "Reset Password",
  preHeader: "We have received a request to reset your password :)",
});
Implementation
export const auth = betterAuth({
	....
  emailAndPassword: {
    enabled: true,
    requireEmailVerification: true,
    sendResetPassword: async (data, request) => {
      const shootmailResponse =
        await shootmail.betterAuth.sendResetPasswordEmail({
          templateId: ShootmailTemplates.PasswordReset,
          toEmail: data.user.email,
          resetPasswordUrl: data.url,
          subject: "Reset Password",
          preHeader: "We have received a request to reset your password :)",
        });

      console.log("shootmailResponse in reset password", shootmailResponse);
    },
  },
});Send email change confirmation email
Method
shootmail.betterAuth.sendChangeEmailVerificationEmail()Usage
const shootmailResponse =
  await shootmail.betterAuth.sendChangeEmailVerificationEmail({
    templateId: ShootmailTemplates.EmailChange,
    toEmail: data.user.email,
    newEmail: data.newEmail,
    verificationUrl: data.url,
  });
Implementation
export const auth = betterAuth({
  user: {
    changeEmail: {
      enabled: true,
      sendChangeEmailVerification: async (data, request) => {
        const shootmailResponse =
          await shootmail.betterAuth.sendChangeEmailVerificationEmail({
            templateId: ShootmailTemplates.EmailChange,
            toEmail: data.user.email,
            newEmail: data.newEmail,
            verificationUrl: data.url,
          });

        console.log("shootmailResponse in email change", shootmailResponse);
      },
    },
  },
});Send invitation to organization email
Requires better auth organization plugin
Method
shootmail.betterAuth.sendOrganizationInvitation()Usage
const shootmailResponse = await shootmail.betterAuth.sendOrganizationInvitation(
  {
    templateId: ShootmailTemplates.TeamInvite,
    toEmail: data.email,
    invitedByEmail: data.inviter.user.email,
    invitedByUsername: data.inviter.user.name,
    teamName: data.organization.name,
    inviteUrl,
  }
);
Implementation
export const auth = betterAuth({
	....
  emailAndPassword: {
    enabled: true,
    requireEmailVerification: true,
    sendResetPassword: async (data, request) => {
      const shootmailResponse =
        await shootmail.betterAuth.sendResetPasswordEmail({
          templateId: ShootmailTemplates.PasswordReset,
          toEmail: data.user.email,
          resetPasswordUrl: data.url,
          subject: "Reset Password",
          preHeader: "We have received a request to reset your password :)",
        });

      console.log("shootmailResponse in reset password", shootmailResponse);
    },
  },
});Send email change confirmation email
Method
shootmail.betterAuth.sendChangeEmailVerificationEmail()Usage
const shootmailResponse =
  await shootmail.betterAuth.sendChangeEmailVerificationEmail({
    templateId: ShootmailTemplates.EmailChange,
    toEmail: data.user.email,
    newEmail: data.newEmail,
    verificationUrl: data.url,
  });
Implementation
export const auth = betterAuth({
	....
  plugins: [
    organization({
      sendInvitationEmail: async (data, request) => {
        const inviteUrl = `https://example.com/accept-invitation/${data.id}`;

        const shootmailResponse =
          await shootmail.betterAuth.sendOrganizationInvitation({
            templateId: ShootmailTemplates.TeamInvite,
            toEmail: data.email,
            invitedByEmail: data.inviter.user.email,
            invitedByUsername: data.inviter.user.name,
            teamName: data.organization.name,
            inviteUrl,
          });

        console.log("shootmailResponse in invitation", shootmailResponse);
      },
    }),
  ],
});
That’s it. Just like that, you can start sending beautiful emails with Better Auth using Shootmail. All the email templates are customizable and you can add other sections to these emails like customer feedback link, CTA to your website, support handles, social media links etc.
If you are using Supabase auth, there is a guide for that too. Here is the link.
Want to know more about Shootmail, visit the website and check the docs.
If you have questions, feel free to shoot a DM to me on Twitter.